Contents
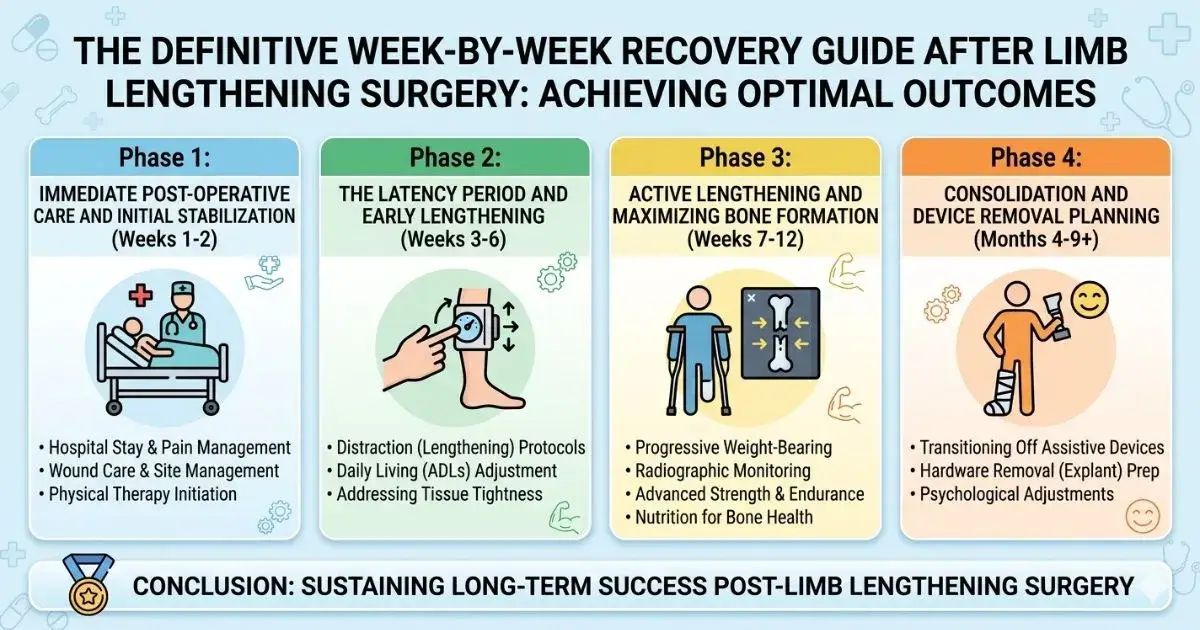
- Phase 1: Immediate Post-Operative Care and Initial Stabilization (Weeks 1-2)
- Phase 2: The Latency Period and Early Lengthening (Weeks 3-6)
- Phase 3: Active Lengthening and Maximizing Bone Formation (Weeks 7-12)
- Phase 4: Consolidation and Device Removal (Months 4-9+)
- Conclusion
Limb lengthening surgery changes lives, but it demands real grit. You face cuts, hardware, and months of careful steps to gain those extra inches. Think of recovery like training for a big race - slow starts build to strong finishes. This guide breaks it down week by week, from hospital beds to walking free. Find simple ways to care for your body and mind¬¬. Try our quick daily hacks. If you follow your doctor's plan, you will reach your goals.
Phase 1: Immediate Post-Operative Care and Initial Stabilization (Weeks 1-2)
Right after surgery, your body needs rest and watch. Swelling peaks, pain hits hard, and you learn to move with new limits. Focus here on healing the cut and keeping bugs away from pins or rods.
Hospital Stay and Pain Management Protocols
You stay in the hospital for three to five days, sometimes longer if things get more complicated. Nurses hook you up to a PCA pump for pain killers through an IV. They switch to pills like opioids or NSAIDs by day two, tapering as you handle it.
Watch for trouble signs like red skin, fever over 101°F, or leg swelling that won't quit - these scream blood clots or infection. Call your team fast if chest pain or shortness of breath hits. Most folks head home by week one's end, but follow-up calls keep tabs.
Pain eases with ice packs and elevation - keep that leg up higher than your heart. Your doc sets a schedule: meds every four to six hours at first. This setup helps you sleep and start light moves without agony.
Wound Care and Pin/Fixator Site Management
Clean sites daily to dodge infections, which hit about 10% of patients if you slack. For external fixators, like Ilizarov rings, wash pins with saline and change dressings twice a week. Use sterile gauze and antibiotic ointment - your kit comes home with you.
Internal nails, such as Precice, mean smaller incisions; just keep the main wound dry and covered. Pat dry after showers, no soaking till cleared. Check for pus, bad smells, or loose pins daily.
Infection risks rise with poor care, so log changes in a journal. Your surgeon shows the routine before discharge. Good habits now save trips back to the OR.
- Sterilize hands before touching the wound
- Avoid applying lotions near the area
- Report unusual discharge or swelling immediately
This phase builds trust in your routine.
Early Movement and Physical Therapy Initiation
PT starts day one, even from bed. You do ankle pumps and toe wiggles to boost blood flow and hold joint flex. No weight on the leg yet - crutches or a walker holds you up.
Sessions last 20-30 minutes or three times a week for the first three weeks. Your therapist guides passive stretches such as bending the knee with help. Aim for 90% knee range without force on the bone cut.
By week two, add seated leg lifts if cleared. Pain should stay under five on a ten-scale. These moves cut stiffness and prep for more.
Phase 2: The Latency Period and Early Lengthening (Weeks 3-6)
Bones need time to wake up before stretching. This wait lets soft callus form at the cut site. You feel antsy, but patience pays off in solid growth.
Understanding Latency and the Start of Distraction
Latency lasts seven to ten days post-op. Your body builds a soft bridge of bone tissue here. Surgeons explain this in consults - skip it, and lengthening fails.
Education cuts worry; ask about your exact start date. X-rays confirm readiness before you turn the dial. This pause heals nerves and vessels too.
Most see first adjustments around day ten. It feels odd at first, like a tight pull. Trust the process - its science, not guesswork.
Mastering the Lengthening Protocol
Doctors set one millimeter per day, split into four quarter-turns. Use the tool your surgeon provides; measure each twist with a ruler for precision. Miss a turn, and you risk crooked growth or nerve pinch.
Do turns at set times, like morning and night. Log every session in an app or notebook. If pain spikes, stop and call - adjustments fix most issues.
Consistency matters; uneven pulls strain muscles. By week four, you'll own the routine. This builds the bone bridge steadily.
- Turn clockwise only, per instructions.
- Clean the device before each use.
- Pair with PT to ease tension.
Managing Daily Living Activities (ADLs)
Bathing can be tricky - use a bath chair and a long-handled sponge. Dress loose, pull pants over casts with a reacher tool. Set up your room: grab bars in the bathroom, a bed riser for easy entry and exit.
Meal prep means one-handed cooking or delivery help. Stock snacks at waist height to skip bending. Family aids, but learns solo tricks fast.
By week six, mobility improves, but plan outings with a wheelchair. These hacks keep frustration low. You reclaim normalcy bit by bit.
Addressing Soft Tissue Tightness and Nerve Tension
Muscles tighten as bones pull apart, like rubber bands stretched far. Achilles or hamstrings complain first - feel that pull? PT adds heel drops or wall stretches, holding 20 seconds, three reps.
Nerve tingles signal too much stretch; report if it lasts over an hour. Ice after sessions and massage helps. Most ease with time and therapy.
Don't push through sharp pain - it means stop. Your team tweaks rates if needed. This keeps gains safe.
Phase 3: Active Lengthening and Maximizing Bone Formation (Weeks 7-12)
Now the real work ramps up. You lengthen daily while watching for weak spots. Body and mind both stretch here.
The Core Lengthening Period: Monitoring Progress and Preventing Complications
Distraction hits full stride, adding up to a centimeter a week. Stress builds, so check-ins ramp to every two weeks. Spot issues early to keep on track.
Complications like non-union affect 5-10% without vigilance. Daily logs track pain, swelling, and turns. Adjust life around rest - naps fight fatigue.
This stretch tests resolve, but progress shows in mirrors and X-rays. Stay sharp.
Radiographic Monitoring and Consolidation Checks
X-rays every four weeks gauge callus thickness. Surgeons seek three cortices bridged for strength. If thin, they slow to 0.5 mm/day.
Bring questions to visits - what's good bone look like? Digital images speed reviews. These checks guide safe speed.
By week 12, most hit goal length. Solid imaging means no delays.
Advanced Physical Therapy
PT shifts to active work: leg presses with light bands, 10 reps, build to walking short distances on parallel bars. Aquatic pools cut gravity if your fixator allows - water floats the load.
Sessions hit 45 minutes, four times weekly. Track endurance; aim for 20-minute walks by end. This rebuilds muscle lost in bed.
Strength gains cut fall risks. Feel the power return.
Nutrition and Supplementation for Bone Health
Yogurt and greens are calcium rich, 1,200 mg a day. Vitamin D from the sun or pills is also good. Drink 600 IU daily. Protein shakes are good for muscle repair; 1.2 grams per kilogram of body weight.
Skip smokes - they slow healing by 30%. Your doc may add bisphosphonates for density. Track intake in a food app.
Good eats speed consolidation. Fuel right, heal fast.
Phase 4: Consolidation and Device Removal Planning (Months 4-9+)
Lengthening stops; now toughen the new bone. This wait feels long, but it is the key to ensuring the long-term success of limb lengthening surgery. Patience shines here.
The Consolidation Phase
No more turns - regenerate hardens over months. Femur needs three months per inch lengthened; tibia two. X-rays every six weeks track density.
Rest more, stress less on the leg. Full weight-bearing creeps in as bone firms. This phase doubles distraction time often.
End in sight keeps you going.
Transitioning Off Assistive Devices
Wean crutches when X-rays show 80% density. Start partial weight, 20 pounds, build slow. Gait training fixes limps - heel-toe steps.
PT watches balance; add core work for stability by month six, many ditch aids. Walk feels natural again.
Preparing for Hardware Removal
Removal happens at 70-80% bone strength, via CT scan. It's outpatient, one-hour under anesthesia. Risks like fracture run low, under 2%.
Recovery means two weeks no weight, then PT ramps. Scars fade quickly. Plan help for that week.
Managing Psychological Adjustments
Mental drain hits mid-way - prolonged limits frustrate. Journal wins or talks to support groups online. Body changes spark doubts; mirrors lie at first.
Therapy sessions help self-talk: "I'm taller, stronger." Friends' cheers boost mood. Mind care equals body care.
Stay connected.
Conclusion: Sustaining Long-Term Success Post-Surgery
Recovery from limb lengthening surgery thrives on steady effort. Nail PT routines, spot infections early, and eat for bone power. Patience turns challenges to triumphs - your new height awaits.
Partner tight with your surgeon and therapists; ask questions often. Track progress weekly to stay motivated. Ready to start? Consult our team today and step into your future.